

Tuesday, April 17, 2012
Thursday, March 29, 2012
Salted Chocolate and Caramel Popcorn

1 bag popped popcorn
2 ½ cups mini pretzels, broken into pieces
1 cup pecans
½ cup salted butter
1 cup firmly packed light-brown sugar
½ cup light-corn syrup
¼ tsp salt
1 tsp vanilla extract
½ tsp baking soda
1 cup milk chocolate chips
½ cup mini marshmallows
Put popcorn into a very large bowl. Be sure to remove
any un-popped kernels. Add in crushed pretzels, marshmallows and pecans and
gently fold mixture together, set aside. In an large microwave safe bowl,
melt butter, it should take about 50 seconds. Stir in brown sugar, light
corn syrup and salt. Mix well. Microwave mixture for 2 minutes,
then stir and immediately return to microwave and cook 2 more minutes.
Remove from microwave, add in vanilla and baking soda and stir until
frothy, about 10 seconds (don’t be tempted to dip your finger in and taste
test, it is HOT). Pour caramel over
popcorn mixture and gently stir until evenly coated. Pour caramel coated
popcorn mixture onto a parchment or wax paper covered cookie sheet. Melt milk
chocolate in a microwave safe bowl, on 50% power in 30 second intervals
stirring after each interval until melted and smooth. Pour melted
chocolate into a piping bag or ziploc bag and cut the tip off and drizzle
melted chocolate over popcorn. Place chocolate covered popcorn in refrigerator
until chocolate hardens, about 20-30 minutes. Remove from refrigerator
and break popcorn into pieces. Store popcorn in an airtight container.
Recipe and Photo Source:
http://www.cookingclassy.blogspot.com/search/label/popcorn
Homemade Lemon Curd

3 egg yolks
1 whole egg
3/4 cup sugar
1/2 cup lemon juice
zest of 2 lemons
4 tablespoons unsalted butter, cut into small cubes
In a small saucepan, whisk together egg yolk and egg until
combines. While whisking, pour in sugar, lemon juice and zest, and continue
whisking until creamy and well incorporated, about one minute. Place over
medium heat, whisking constantly, until the custard thickens and can coat the
back of a wooden spoon, about 8-10 minutes. Remove the pan from the heat, and
stir in the butter, one cube at a time. Strain into a bowl or jar, cover
surface with plastic wrap and chill in the refrigerator for at least one hour. Makes
1 cup
Recipe and Photo Source: http://kitchenconfidante.com/simple-sundays-lemon-curd-recipe
Pepperoni Pizza Puffs

3/4 cup flour
3/4 tsp baking powder
1/2 tsp garlic powder
3/4 cup whole milk
1 egg, lightly beaten
4 oz mozzarella cheese, shredded (about 1 cup)
1/2-3/4 cup pepperoni, chopped
1/2 cup pizza sauce
Preheat the oven to 375°. Grease a 24-cup mini-muffin pan. In a large bowl, whisk together the flour, garlic powder and baking powder; whisk in the milk and egg. Stir in the mozzarella and pepperoni; let stand for 10 minutes. Stir the batter and divide among the mini-muffin cups. Bake until puffed and golden, 20 to 25 minutes. Meanwhile, microwave the pizza sauce until warmed through. Serve the puffs with the pizza sauce for dipping.
Recipe and Photo Source: http://www.plainchicken.com/2011/02/sausage-pepperoni-pizza-puffs.html#more
DIY Swing Set
Build A-Frames

Child safety first: Round the edges and ends of all pieces
of lumber with a belt sander. Use 3/8-inch carriage bolts for fasteners and
countersink the holes on the threaded side, so that no bolts protrude from the
frame. Construct the A-frame ends from 8- or 10-foot-long, 4-by-4
pressure-treated posts. The two posts meet at an angle of 60 degrees. To
accommodate a cross beam between end frames, cut the post top ends at 30
degrees. Cut the post bottom ends at 60 degrees to sit flat on the ground. See
the illustration.
Use a rafter square to mark the angles. You are making an equilateral triangle in which the base is the same as the height. To use 8-foot long posts, make the base 7 feet wide and the finished height will be about 7 feet. Cut the posts on a miter saw. For the bottom ends of the posts, you will have to cut complementary angles since the maximum angle on a miter saw is 45 degrees. Add two 2-by-4 cross pieces, one at the apex where the angle cuts end and the other at a height of 3 1/2 feet from the bottom of the A-frame. The opening for the swing support beam should be 3 1/2 inches wide or slightly more--measure the beam for the opening size. Drill holes for 3/8-inch carriage bolts and countersink the holes on one side so that the bolt ends, washers and nuts are below the surface of the wood. Trim the ends of the cross pieces to match the 60-degree angle of the A-frame.
Use a rafter square to mark the angles. You are making an equilateral triangle in which the base is the same as the height. To use 8-foot long posts, make the base 7 feet wide and the finished height will be about 7 feet. Cut the posts on a miter saw. For the bottom ends of the posts, you will have to cut complementary angles since the maximum angle on a miter saw is 45 degrees. Add two 2-by-4 cross pieces, one at the apex where the angle cuts end and the other at a height of 3 1/2 feet from the bottom of the A-frame. The opening for the swing support beam should be 3 1/2 inches wide or slightly more--measure the beam for the opening size. Drill holes for 3/8-inch carriage bolts and countersink the holes on one side so that the bolt ends, washers and nuts are below the surface of the wood. Trim the ends of the cross pieces to match the 60-degree angle of the A-frame.
Swing Support

Stand the A-frames up in place and temporarily brace each
with two 1-by-3 boards. Plumb the frames with a level. Lift a 4-by-6 beam (get
a helper, they are heavy) into place between the two frames. Secure with two
1/2-inch bolts by drilling through the post, into the beam and out the other
post. Countersink the holes to hide the nuts, washers and bolt ends. Make
swings seats from 5/4-by-6-inch deck boards. Drill two holes in each end for
ropes. A good width is 12 to 14 inches. In the swing support beam, drill
3/8-inch holes and install 3/8-inch eye-bolts. Countersink the holes on top of
the beam to hide the nuts, washers and eye-bolt ends. Suspend the swings with
soft, 5/8 inch braided rope. Synthetic rope is best since it doesn't rot.
Thread the rope through an eye-bolt and take both ends down through one end of
the swing seat, one rope end through each hole. Tie a knot and secure the tag
ends of the knot with waterproof duct tape.
Anchors

Dig post holes 6 inches in diameter and 2 feet deep next to
each post. Set a pressure-treated 2-by-4 upright in the hole and bolt it to the
4-by-4 frame post. Counter sink the nut and bolt end into the 4-by-4. Add half
a 40-pound bag of quick setting concrete to the hole and stir in water per
instructions. Once the concrete sets, typically after 30 to 60 minutes, refill
the remainder of the hole with dirt.
Source: http://www.ehow.com/way_5453488_diy-wooden-swingset-budget.html
Friday, March 16, 2012
Red Beans and Rice
 |
| Photo Source: http://media-cdn1.pinterest.com/upload/262334747013825268_v0IxuwOf_f.jpg |
1 1/2 cup long grain white rice
3 cups hot water
1 teaspoon salt
2-3 tablespoons extra virgin olive oil
1 pkg smoked sausage
3 cups hot water
1 teaspoon salt
2-3 tablespoons extra virgin olive oil
1 pkg smoked sausage
1 pkg Andoullie sausage
2-3 cans red beans
Tony Chachere's Creole Seasoning
2-3 cans red beans
Tony Chachere's Creole Seasoning
Add the rice, water and salt to a sauce pan with a lid. Bring to boil,
reduce heat to low, then cover & simmer for 15 mins. Meanwhile,
thinly slice the sausage and drain the juice from the red beans into the
sink. Add 2-3 tbsp olive oil to to a large skillet and begin heating
over medium heat. Add the sausage, give a sprinkling of creole seasoning
and stir occasionally for about 7 mins until the sausages start to get
sizzly on both sides. Add the red beans and stir until warmed through.
About this time, your rice should be done too. Serve the beans and
sausage over the rice. Add extra creole seasoning as desired at the
table. Serves 4.
Source: http://www.kevinandamanda.com
Wednesday, February 8, 2012

Thursday, December 1, 2011
Best-Ever Chocolate Chip Cookies
Best-Ever Chocolate Chip Cookies
barely adapted from Anna Olson, Food Network Canada
Ingredients:
3/4 c. unsalted butter, softened
3/4 c. brown sugar
1/4 c. granulated sugar
1 egg
2 tsp. vanilla extract
2 c. all purpose flour
2 tsp. cornstarch
1 tsp. baking soda
1/2 tsp. salt
1 c. bittersweet chocolate chips
Preheat oven to 350 degrees F. In the bowl of a stand mixer fitted with a paddle attachment, cream together butter and sugars until fluffy and light in color. Add egg and vanilla and blend in. Mix in flour, cornstarch, baking soda and salt. Stir in chocolate chunks. Using a standard-sized cookie scoop or tablespoon, drop dough onto a prepared baking sheet. Bake for 8-10 minutes, until barely golden brown around the edges. (The tops will not brown, but do NOT cook longer than ten minutes.) Let cool, on the sheet, on a wire rack for five minutes. Remove from baking sheet and let cool completely. Try not to eat them all.
Wednesday, October 19, 2011
Old Fashioned Sore Throat Cure

Just heat 1 cup of water
Add 1 Tbsp of lemon juice
2 Tbsp honey
Stir and enjoy! That was simple...now take it nice and easy (harder!)...and go get some rest (hardest!)!
Photo Source: http://www.homelife.com.au/life+ideas/wellbeing/how+to+treat+a+sore+throat,4955
Tuesday, October 18, 2011
Sore Throat Cure
2-4 slices of lemon
2 cm piece of ginger, thinly sliced
A handful of mint sprigs
1-2 cinnamon sticks
Honey, to taste
Infuse the lemon, mint, ginger, and cinnamon in boiling water for 5 minutes.
Pour into mug and add honey to sweeten and soothe the throat.
Photo and Recipe Source: http://www.homelife.com.au/life+ideas/wellbeing/how+to+treat+a+sore+throat,4955
Monday, October 17, 2011
The B.R.A.T Diet

The B.R.A.T. diet is great for anyone with stomach upset, diarrhea, or vomiting. My Mom would have us eat this way of we were sick as kids and it works! I still use it for my kids today!
Bananas
Rice
Applesauce
&
Toast
Photo Source: www.carriessweetlife.com
Sunday, October 16, 2011
Three Great Feel-Better-Soon Tips

If you can get your kid to eat it, BLACK LICORICE will cure their constipation nine times out of ten!
Did you know that the chemical reaction between baking soda and vinegar creates a cooling effect that will soothe your child’s minor burns. Just pour equal amounts of the ingredients into a bowl to bathe your child’s hand till the burning stops.
Ear infections are being treated less and less these days with antibiotics, but that doesn’t mean they aren’t painful. I like to use a hot pack big enough so they can lay their head down to relieve the “ache
Text and Photo Source: http://www.howdoesshe.com/7-secret-home-remedies
Saturday, October 15, 2011

Friday, October 14, 2011
Homemade Lip Gloss

1 cup petroleum jelly
1 pkg of kool-aid drink powder (Cherry or Strawberry)
labels printed out on sticker paper
scissors or 1 inch paper punch
1. put about 1 cup vaseline in a microwave safe bowl
2. heat the vaseline in the microwave in 30 second increments, stirring between each heating. It took me about 7-8 minutes to melt each batch of vaseline. It will be liquid when it is fully melted. It will be very hot! Make sure you wear gloves or oven mitts and make sure children are being supervised.
3. take out of microwave and stir in kool-aid drink crystals until desired colour is reached - I used the whole package for each batch. Stir until the crystals are completely dissolved.
4. if starting to solidify you can heat again for another 30 seconds - skip this step if it is still liquidy
5. pour into your lip gloss containers and leave to solidify - a couple hours
6. repeat this whole process if making more flavours
7. print out labels on sticker paper
8. using either a 1 inch punch, or scissors, cut out the circle labels and attach to your lip gloss container
9. give to all your favourite people, but remember to save a few for yourself too!
Photo and Text Source: http://meetthedubiens.blogspot.com/2011/01/make-your-own-lip-gloss.html
Thursday, October 13, 2011
Homemade Mosquito Repellent
Homemade Mosquito Repellent
Here’s what you’ll need: essential oils (citronella and lemongrass are musts, I also like lavender or you could use tea tree oil or geranium oil for tick protection), 14 oz. bottle of witch hazel (available in grocery stores & pharmacies usually close to the rubbing alcohol), a spray bottle (or two–one for home and one for the diaper bag/car), a jar for mixing, and a funnel.

We used these essential oils: citronella, lemongrass and lavender. You could also use peppermint or cedar wood essential oils as well.

I cleaned out an empty detangler spray bottle for our “on the go” spray.

1. Pour the witch hazel into the glass jar then add your essential oils. We put about 15 drops of both citronella and lemongrass, and about 10-12 drops of lavender.

2. Put the lid on the jar and shake vigorously until it is mixed.

It should be pretty cloudy.

3. Pour into your spray bottles using a funnel.

Make a label (or write in Sharpie). I used an old Scrapbook sticker to make it look “cuter”. :)

You can spray this on the exposed parts of your body: arms, legs, neck, ankles, feet, etc and then rub it in. Make sure you don’t spray it on your face or get it in your eyes. If you put this on your kids, be sure to try just a little bit first on one area of their skin to make sure they’re not allergic to any of the essential oils.
Or you can use it to spray the area around where your sitting outside.
Original Text and Photo Source: http://www.icanteachmychild.com/2011/06/make-it-natural-mosquito-spray/
Wednesday, October 12, 2011
Honey Cuticle Cream

It's easy, fun & no chemicals added - you can whip up your own Honey Cuticle Cream in less than five minutes flat. And I love re-using metal Altoid tins! How perfect is that?
1.5 ounces beeswax
3 ounces apricot kernel oil
1 tablespoon honey
Melt the wax and oil in the microwave, stir in the honey, and pour into tins or other containers.
Photo and Text Source: http://lepetithappy.blogspot.com/2010/06/diy-it-honey-cuticle-cream.html
Thursday, October 6, 2011
Homemade Body Scrub

"Homemade body scrub... It's easy, all-natural, and so inexpensive, you'll want to make enough for gifts.
Body oil, Burt's Bees
Epsom salt, sea salt, or organic cane sugar
12 oz. PET Jar with cap, sks-bottle.com
Lemon zest
Combine 1 cup of body oil with 2 cups of Epsom or sea salts or organic cane sugar, depending on how fine a grain you like. We added lemon zest for color and fragrance. Package in jars...plastic is safest by the tub."
Text and Photo Source: http://www.marthastewart.com/337727/homemade-body-scrub?backto=true&backtourl=/photogallery/mothers-day-gifts#slide_13
Wednesday, October 5, 2011
Sewing Pajama Pants
Original post here: http://www.littlepinkmonster.com/2010/06/18/sewing-pants-101/
I am LOVING Sewing Pants 101. By Natasha on June 18, 2010 in naptime crafting. I have made each of my kids to sets of pajama bottoms this week!
"I thought I’d start with a good play by play on how to sew pants. I don’t care how little you know about sewing, if you have a machine & you know how to thread it give these a try.

"I thought I’d start with a good play by play on how to sew pants. I don’t care how little you know about sewing, if you have a machine & you know how to thread it give these a try.

This process will work for all sorts of pants…elastic waist,
drawstring, sweats or pj’s. First off you’ll need to make a pattern. Best way
to do that is find a pair of pants that fit the way you’d like & lay them
out on your fabric (or paper if you want to make a copy you can use over &
over) with the crotch pointed out like in the picture below. Trace the legs
just to the outside (and therefore adding about a 1/4″ seam allowance) &
extend your pattern 2 & 1/4″ at the top of the leg to account for the waistband
you’ll be making. Cut out the fabric pieces so they’re folded in half like so.
(that way when you open it up it’s an entire pantleg & not just the front,
it’ll save you from sewing a side seam like a pair of jeans would have)


You’ll need two of these.


Now you’ll want to sew each pantleg from the crotch down to
the bottom of the pant with the right sides facing together. Pin first, sew
second. (you can see my stitches in blue)
*Also here’s a tip, if using a regular sewing machine (NOT a
serger, been there, done that, no bueno) if you pin seams horizontally
(perpendicular to the way your machine is stitching) then you can just sew
right across the pins, no need to take them out as you go.


Next step is a neat trick. Lay your two legs next each other
like the pic below. Turn the leg on the left right side out but leave the right
one inside out. Slide the right-side out leg into the inside out leg. Line them
up & pin the seams from the bottom of the crotch to the top of the
waistband.
Stitch this seam being sure to stitch back & forth
(reverse & forward) a bit at the beginning & end of the seam. This is
sometimes called a “lockstitch” & just means you’re locking the seam into
place so it won’t unravel later when it gets stressed. After stitching you can
pull the leg back out & wah-lah!


They’re lookin’ a lot like pants, aren’t they? Last step is
making the waistband. I’ll show you how to do both an elastic waist & also
a drawstring…Measure the waistline of the intended pant-wearer & cut a
piece of elastic that is that length + 1″. Set elastic aside.


Fold the waistband in one inch & pin in place. *Another
trick, if you aren’t crazy about pinning or just want to make your stitching
easier you should iron your seams first, then stitch. I rarely take the time to
do this because it requires setting up the iron but whenever I do it really
does make things easier. Stitch waistband down (therefore making a casing for
the elastic) but don’t go all the way around, leave a 2″ opening so we can
thread the elastic through it. Take a safety pin & attach it to one end of
your elastic, use the safety pin as something to hold onto while you thread the
elastic through the waistband casing & back out the 2″ opening. Being
careful to make sure the elastic isn’t twisted anywhere inside the casing
first, go ahead & stitch the two ends of your elastic together. Go back &
forth several times to make sure that sucker’s not coming apart no matter what.
Stitch the 2″ opening shut.

If you were just making elastic waist pants then congrats,
you’re officially done! That’s it! Lots
of directions but it’s actually kind of easy, right? Once you make a few you’ll
be able to make pants in 15 minutes, easy. Not to mention capris, shorts,
bloomers…they’re all just slight variations.”
Photo and Text Source: http://www.littlepinkmonster.com/2010/06/18/sewing-pants-101/
Tuesday, October 4, 2011
Braided Apple Strudel

The recipe below includes my adjustments.
For the Apple Filling
3 medium-size Granny Smith apples
3 tablespoons granulated sugar
1 1/2 teaspoons cinnamon
2 teaspoons lemon juice
For the Bread
1 package puff pastry
Preheat the oven to 350 degrees. Peel, core, and slice the apples into thin slices, then cut the slices in half. Toss the apple pieces with the sugar, cinnamon, and lemon juice. Bake the apple filling in an 8-inch square baking pan (or 9-inch pie tin) for 15 minutes. Remove from the oven and set aside.Turn the oven up to 400. Spray a rolling pin with cooking spray and roll the puff pastry out into a large rectangle, about 12-inches by 16-inches in size. Lift onto a greased baking sheet. Using a pizza cutter or sharp knife, cut each side into strips about 1-inch wide down each side, leaving the center third of the dough uncut. Spread the apple filling down the middle third of the dough. Fold strips of dough into the center, crisscrossing the filling by alternating strips from each side. Lightly press ends to seal, and straighten out the braid with your hands, if necessary, to straighten. Bake the braid in the oven for 15 minutes, or until golden brown. Remove from the oven and let the braid cool for several minutes. Slice and serve.
Original Recipe and Photo Source: http://www.eatliverun.com/apple-braid/#more-24074
Monday, October 3, 2011

Sunday, October 2, 2011
Blueberry Lemonade
 |
| Photo Source: http://www.kellyoshiroevents.com/blog/2011/08/12/on-the-rocks-blueberry-lemonade/ |
My Blueberry Lemonade
1 cup lemon juice
1/2 cup sugar
2 quarts cold water
1 half pint blueberries
Ice
Stir gently to mix, chill and serve.
Saturday, October 1, 2011
Raspberry Lemonade
 |
| Raspberry Lemonade |
My Raspberry Lemonade
1 cup lemon juice
1/2 cup sugar
2 quarts cold water
1 half pint raspberries
Ice
Stir gently to mix, chill and serve.
Friday, September 30, 2011
Strawberry Lemonade

My Strawberry Lemonade
1 cup lemon juice
1/2 cup sugar
2 quarts cold water
1 half pint strawberries, finely diced
Ice
Stir gently to mix, chill and serve.
Thursday, September 29, 2011
My Homemade Lemonade
 |
| Lemonade |
My Homemade Lemonade
1 cup lemon juice
1/2 cup sugar
2 quarts cold water
Ice
Stir gently to mix, chill and serve.
Wednesday, September 28, 2011
Frozen Coconut Limeade
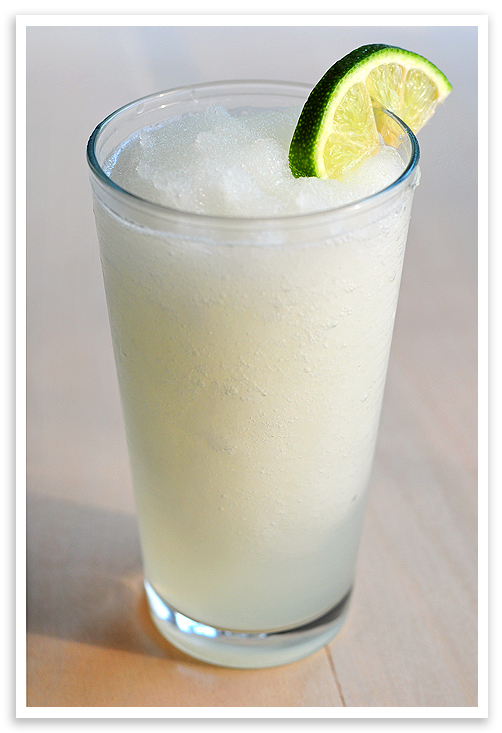
5 1/2 cups ice
1/2 cup cream of coconut
4-5 tablespoons frozen limeade concentrate
water as needed
Add all ingredients to blender and blend until smooth.
Original Recipe and Photo Source: http://shewearsmanyhats.com/2011/06/frozen-coconut-limeade/?utm_source=rss&utm_medium=rss&utm_campaign=frozen-coconut-limeade
Tuesday, September 27, 2011
Apple Maple Parfait

Apple Maple Parfait
8 small to medium apples – peeled, cored and chopped into 1 1/2 inch cubes (apple count will depend on the size of your apples. Mine were a little on the smaller side)
1 cup brown sugar
2 teaspoon cinnamon
1 teaspoon ground nutmeg
2 teaspoon vanilla paste – if you do not have vanilla paste you can use the seeds of a scraped vanilla bean or vanilla extract
2 tablespoon lemon juice
4 8oz. containers vanilla flavored Greek yogurt
Maple syrup
Granola
Take chopped apples and put in large bowl. Add brown sugar, cinnamon, nutmeg, lemon juice and vanilla paste, stir and let sit for 30 minutes. The apples should now be sitting in a bowl of sugary liquid. Take apples and juice and put into saucepot on the stove. Simmer for about 10 minutes or until the apples are soft but not falling apart. The sugar mixture should thicken up a bit too. Remove from heat and let cool. In a 1/2 pint glass mason jar add a spoon full of the cooled apple mixture, drizzle of maple syrup and a large spoonful of yogurt – continue until you reach the top of your jar, then sprinkle with granola and enjoy!
Recipe and Photo Source; http://www.nutmegnanny.com/2011/09/06/apple-maple-parfaitkitchen-play/
Monday, September 26, 2011

Sunday, September 25, 2011
Raspberry Limeade

1 cup water
1 cup sugar
½ cup freshly squeezed lime juice
½ cup strained raspberry puree
1 tbsp. lemon juice
3 cups sparkling water, chilled
Lime slices and fresh raspberries, for serving
In a small saucepan over medium heat, combine the water and sugar. Heat, stirring occasionally, until the sugar has dissolved. Remove from the heat. In a serving pitcher, combine the lime juice, raspberry puree, and lemon juice. Stir in the simply syrup. Chill until ready to serve. Just before serving, stir in the sparkling water. Garnish with lime slices and fresh raspberries as desired.
Recipe and Photo Source: http://annies-eats.net/2011/08/29/raspberry-limeade/
Saturday, September 24, 2011
Quick and Easy Nutella Hot Chocolate

Quick and Easy Nutella Hot Chocolate
Serves 1
1 T nutella
1 cup milk
Whisk nutella into milk and bring to a simmer on the stove. Serve in your favorite mug with whipped cream and marshmallows.
Source: http://www.eatliverun.com/quick-and-easy-nutella-hot-chocolate/
Friday, September 23, 2011
All Natural Mosquito Spray

|
| We used these essential oils: citronella, lemongrass and lavender. You could also use peppermint or cedar wood essential oils as well. |
|
| I cleaned out an empty detangler spray bottle for our “on the go” spray. |
|
| 1. Pour the witch hazel into the glass jar then add your essential oils. We put about 15 drops of both citronella and lemongrass, and about 10-12 drops of lavender. |
|
| 2. Put the lid on the jar and shake vigorously until it is mixed. |
|
| It should be pretty cloudy. |
|
| 3. Pour into your spray bottles using a funnel. |
|
| Make a label (or write in Sharpie). I used an old Scrapbook sticker to make it look “cuter”. :) |
You can spray this on the exposed parts
of your body: arms, legs, neck, ankles, feet, etc and then rub it in.
Make sure you don’t spray it on your face or get it in your eyes. If
you put this on your kids, be sure to try just a little bit first on one
area of their skin to make sure they’re not allergic to any of the
essential oils.
Or you can use it to spray the area around where your sitting outside."
Original Text and Photo: http://www.icanteachmychild.com/2011/06/make-it-natural-mosquito-spray/
Subscribe to:
Posts (Atom)