I love doughnuts and I love muffins! When I found these recipes, I knew they would be perfect for me! The best news.... they turned out delicious! I will definitely be making these again! I took the muffin recipe from one source and the glaze recipe from another and I am thoroughly enjoying the results! The recipe included below is the what I made including my adjustments to the recipes.
 |
| http://sweetpeaskitchen.com/2011/05/17/glazed-doughnut-muffins/ |
 |
| http://macandcheesereview.blogspot.com/2009/08/donut-muffins.html |
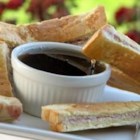
Glazed Doughnut Muffins
3/4 cup sugar
1 egg
1/4 cup vegetable oil
3/4 cup milk
1 teaspoon vanilla
1 1/2 cups flour
2 teaspoons baking powder
1/4 teaspoon salt
1/4 teaspoon ground nutmeg
In a large bowl, beat together sugar and egg until light in color. Add vegetable oil, milk, and vanilla to sugar mixture and combine.Then add the flour, baking powder, salt, and nutmeg. and stir to combine. Fill muffin cups 3/4 full, and bake in a 350 degree preheated oven for 20 minutes.
Topping for Glazed Doughnut Muffins
3 tablespoons butter; melted
1 cup confectioners’ sugar
1 teaspoon vanilla
4 tablespoons hot water
To make the glaze, In a medium bowl mix together the melted butter, confectioners’ sugar, vanilla and water. Whisk until smooth. When the muffins have cooled slightly, dip the muffin crown into the glaze and allow the glaze to harden. Once hardened, dip a second time and allow to harden then serve.
Topping for Sugar Doughnut Muffins
2 tablespoons butter, melted
1/2 cup superfine sugar (can pulse regular sugar in food processor to make), or powdered sugar
When the muffins have cooled brush the muffin crown with butter and then dip into the sugar until the top is coated.
Sources:
http://sweetpeaskitchen.com/2011/05/17/glazed-doughnut-muffins/ and
http://macandcheesereview.blogspot.com/2009/08/donut-muffins.html


